
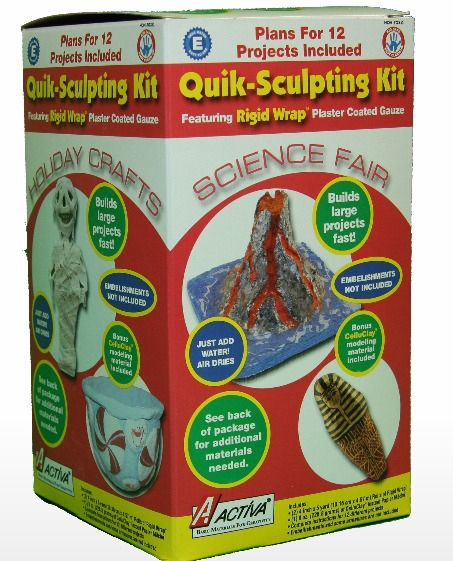
My girls adore hands-on projects. The more the better! I have successfully loosened up over the years and I do try to let them have more hands-on stuff. They were with me when I opened the box from ACTÍVA Products and they were so excited when I pulled out the Rigid Wrap and CelluClay Quik-Sculpting Kit. The package looks like so much fun and they quickly began deciding on which project they wanted to work.
I was excited to see the project ideas included in the free e-book, ACTÍVA Products' Favorite Sculpture KIDS CRAFTS. There are 12 absolutely gorgeous projects, something for every age. The photographs are stunning and the directions are clear and concise. I would feel very comfortable giving the supplies and instructions to my oldest two daughters (10 and 12) to make on their own. My 7-year-old definitely needs more supervision and guidance, but she could definitely manage any of these projects as well.

As amazing as all of these were I decided to deviate from the suggestions and we did our own creation to go along with our study of the United States this summer. As we learn the regions of America and the states which are in them, I thought it would be a great idea to give them a chance to make a topographical map. I felt very confident in doing this because have used Rigid Wrap before to make Egyptian Mummy Masks. Having worked with the material before I knew exactly what to expect.
Be prepared that while this is a lot of fun, it can be a little messy. You'll mostly just be dealing with the dust upon opening and while handling the clay and rigid wrap. The amount of mess will also depend on the age of your kids. When we used this 2 years ago it was a MUCH messier ordeal than it was this time around! I had never worked with the CelluClay, but it was also easy to manage even if a little messy.
To mix the CelluClay I had Rose measure a cup of water into a zip-lock bag and then I added a cup of the dry mixture. This was also a bit messy and the measuring process should be handled by older children or adults. Once in the bag we squished it to mix it. I felt this would be easier and less gooey than trying to do it ourselves with a spoon or our hands. Like I said, I'm not really into being messy!
One of the keys with the rigid wrap product is to use just the right amount of water. Too much and you will just have a glop of gooey, sticky mess which is really hard to work with. Too little and it won't stick. I cut it into smaller strips for the girls and they would let me know if they needed something bigger or smaller. We found it worked really well to quickly dip the first layers in water. When applying the next layers it was adequate to place it, then dip our fingers in water to smooth out the holes.
Here are some pictures of our project in progress!

I printed a large, but mostly blank map of the USA on cardstock and attached it to poster board. I remember just how "wet" this material is in progress and I wanted to make sure their map didn't get warped. I gave them a color coded topigraphical map of the USA and showed them how to use the CelluClay to make mountain ranges and raised topography on the map. Then I let them loose!
We normally would let this dry for a while, but I decided to speed the process up a little bit and used a hair dryer. The instructions give other options for speeding up the drying time, but because ours was rather large the hair dryer was most practical and quite easy! Rose even helped me with it some.

After drying the girls began to apply the rigid wrap to the map. I showed them how to manipulate it to conform to the contours of the map. That is a really fancy way to say they smushed it around to make it look right! You want to make sure to smooth the wet wrap until you do not see any holes left. This does take some time and patience. With younger children you may want to go after them and fix any spots where you still see lots of holes or they may become frustrated while painting.
I also used the hair drying to speed up the drying process again and then allowed it to sit in the very hot sun we have been experiencing in the south these last few weeks. Our back porch gets full, afternoon sun which provides an ideal drying spot for our art projects!

It was finally time to paint! The entire USA was pained light green and again allowed to dry for about an hour. Then the girls came back and added the details for the Great Lakes (dark blue), oceans (light blue), bordering land (tan), and the highest elevations (dark green). I showed them where to paint since we were only mapping the contiguous 48 states and needed to cover things not important to our learning process on the map, but they pretty much just went at this on their own start to finish.

Here is their finished product which is pretty neat, but in order to get a really good understanding of just how 3D the material actually is, I have a few close ups to share.


They had a really great time creating this in one day. We were able to do it all in one day because of speeding up drying time. I know it isn't exactly perfect, but they learned about where the major mountain ranges are in the United States and that was my goal. Perfection is overrated anyway. They love their group effort which is another fun aspect to this. So much of our learning is individual, which I love, but this means when they have the opportunity to work together they usually really have fun with it!
Their daddy was pretty impressed by this and enjoyed hearing them share all about which parts they created or painted. I was once again reminded just how great hands-on learning really is for my girls. They can love to read and learn a great deal this way, but experiencing their learning through touch and creativity is uniquely meaningful.
Take a look at what my Crewmates had to say!


What a FANTASTIC project!! We absolutely love how you used Rigid Wrap to create this topographical map - so smart! Thanks for sharing this great idea.
ReplyDelete